Funds
The Funds tab allows you to manage your trading capital directly from the platform. You can add, withdraw, and track available margins in real time.
Funds Summary
- Margin Available → Total margin balance available for trading.
- Margin Used → Margin blocked for your current open positions.
- Cash Balance → Actual cash available in your account.
- Payin → Money added into your trading account.
- Payout → Withdrawals made from your trading account.
Types of Margins Displayed
- Var Margin → Margin collected as per SEBI regulations to cover volatility risk.
- Delivery Margin → Margin required when taking delivery of shares.
- ELM (Extreme Loss Margin) → Additional margin charged to cover extreme market movements.
- SPAN Margin → Required margin for F&O contracts calculated using risk models.
- Exposure Margin → Additional margin over SPAN, collected to cover overall exposure.
- Collateral → Value of pledged securities available for margin.
Premium Segments
This section shows margin utilization for specific product types across exchanges:
- FNODAY → Margin used for intraday F&O trades.
- FNONRML → Margin used for overnight F&O positions.
- CDSDAY → Margin used for intraday currency derivatives.
- CDSNRML → Margin used for overnight currency derivative positions.
- MCXDAY → Margin used for intraday commodity trades.
- MCXNRML → Margin used for overnight commodity trades.
This section helps traders monitor risk and capital allocation across equity, F&O, currency, and commodity segments in real-time.
Adding Funds in ANT - UPI
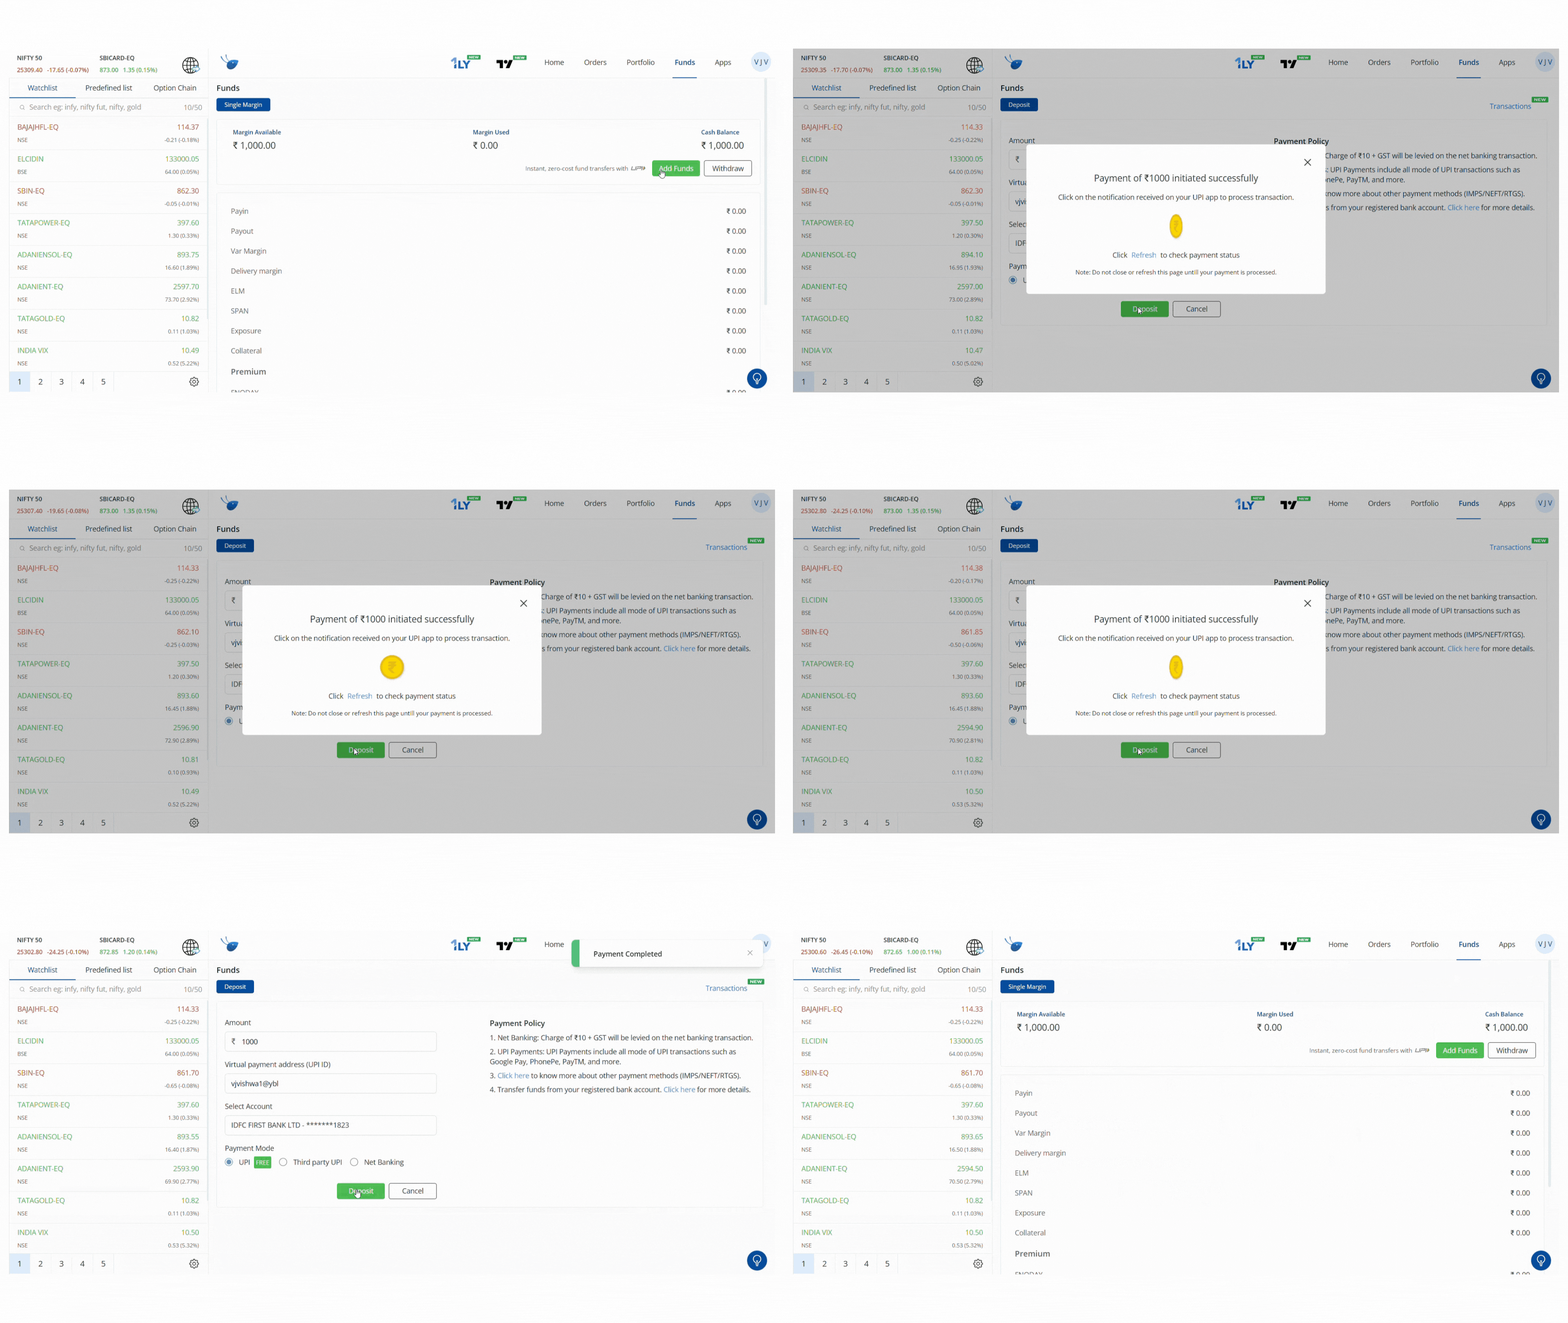
Transfer funds instantly from your registered bank account using UPI, free of cost. ANT accepts UPI transfers only from accounts linked with your trading account.
To add funds using UPI in ANT, follow these steps:
- Go to the Funds tab and click on Add Funds.
- Enter the amount you wish to transfer (minimum ₹50).
- Enter your UPI ID (linked to your registered bank account).
- Select the bank account from the dropdown.
- Choose UPI as the payment mode and click on Deposit.
- A collect request will be sent to your UPI app (Google Pay, PhonePe, PayTM, BHIM, etc.).
- Approve the request and enter your UPI PIN.
- Once successful, your trading balance will be updated instantly in ANT.
Important:
- Ensure you use the registered bank account’s UPI ID.
- Do not transfer funds by manually entering Alice Blue’s UPI ID — always use the in-app Deposit option.
- For other modes like Net Banking, IMPS, NEFT, or RTGS, charges may apply as per bank policies.
Adding Funds in ANT - Third-Party UPI
Apart from using your registered UPI ID, you can also add funds through Third-Party UPI apps like Google Pay, PhonePe, PayTM, and others. Please note, bank and gateway charges may apply when using this option.
Steps to Add Funds via Third-Party UPI
- Go to the Funds tab and click Deposit.
- Enter the amount you wish to add (minimum ₹50).
- Select your bank account from the list.
- Choose Third-Party UPI as the payment mode and click Deposit.
- A Razorpay checkout window will open.
- A collect request will be sent to your UPI app.
- Approve the request and enter your UPI PIN to complete the transfer.
- On successful payment, the funds will be instantly reflected in your ANT trading balance.
Important Notes
- Ensure your UPI ID is linked to the bank account registered with Alice Blue.
- Transaction charges (if any) will be displayed before confirming.
- Always complete the transfer via the Razorpay request, do not manually transfer funds to the UPI ID.
Adding Funds in ANT – Net Banking
You can add funds directly from your registered bank account using Net Banking. Please note, a charge of ₹10 + GST is applicable per transaction.
Steps to Add Funds via Net Banking
- Go to the Funds tab and click Deposit.
- Enter the amount you want to transfer.
- Select your registered bank account from the dropdown.
- Choose Net Banking as the payment mode and click Deposit.
- You will be redirected to your bank’s login page.
- Enter your Mobile Number / Username and login credentials to proceed.
- Authorize the payment using your Net Banking PIN / OTP.
- Once completed, the funds will be updated in your ANT trading balance instantly.
Important Notes
- Funds can be transferred only from your registered bank account linked with Alice Blue.
- Transaction charges (₹10 + GST) apply for each Net Banking transfer.
Withdraw Funds in ANT (Payout)
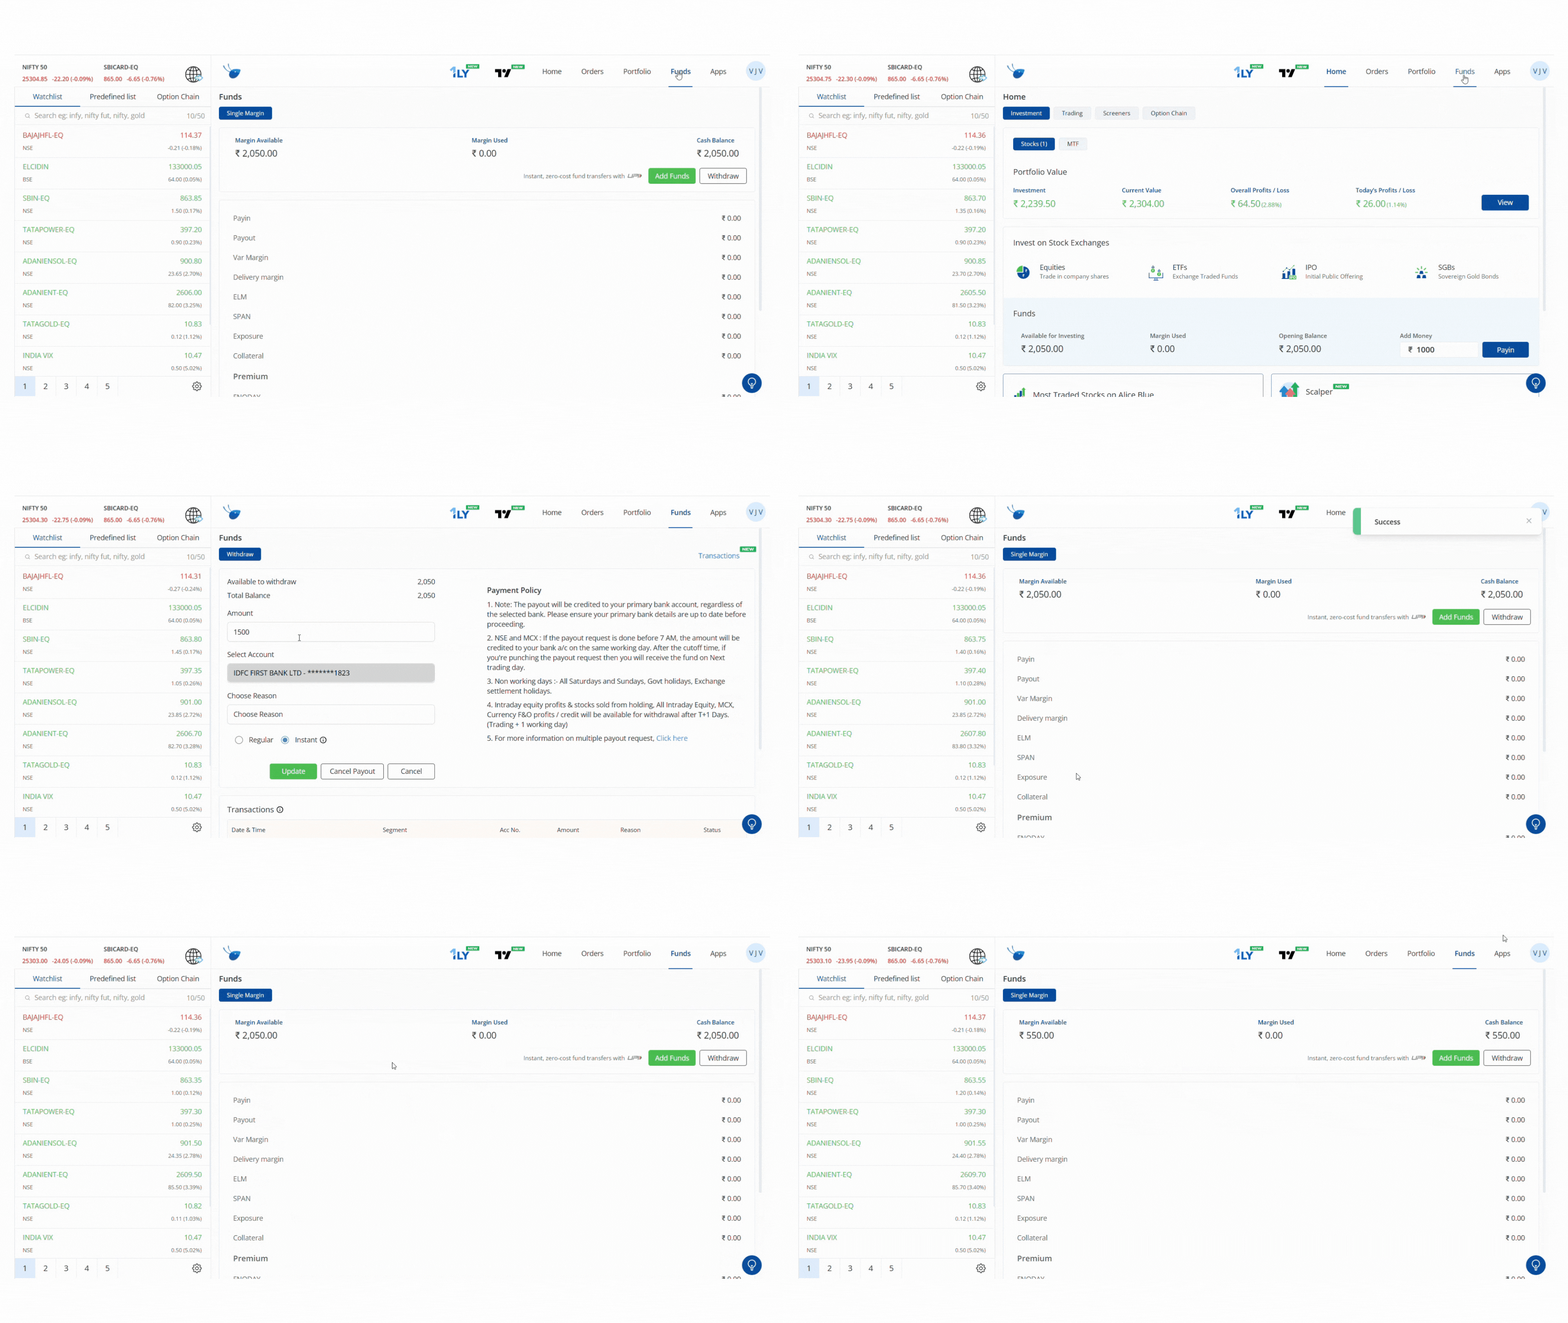
You can withdraw available funds from your ANT account directly to your registered bank account.
Steps to Withdraw Funds
- Go to the Funds tab.
- Click on Withdraw.
- Enter the withdrawal amount (minimum ₹1).
- Select your linked bank account.
- Choose a reason for withdrawal (e.g., personal need).
- Select Regular or Instant payout.
- Regular → Funds processed as per exchange settlement cycle.
- Instant → Funds credited instantly. Click to know more
- Click Withdraw to confirm.
Payout Policies
- The payout will always be credited to your primary registered bank account. Ensure your bank details are updated.
NSE & MCX:
- Requests before 7 AM → Credited on the same working day.
- Requests after cutoff → Credited on the next trading day.
- Non-working days: No payouts are processed on Saturdays, Sundays, Govt holidays, or exchange settlement holidays.
Profits & Credits:
- Intraday equity profits, MCX & F&O credits → Withdrawable only on T+1 working day.